Print off labels to reference and identify your parts, and adjust your printing settings to your requirements.
OptiCut will let you print a label for each part that you can stick on the part so it will be easily referenced and located.
First let’s import a cutting list and optimize it to create the cutting maps.
Now click File > Print Labels and you’re done.
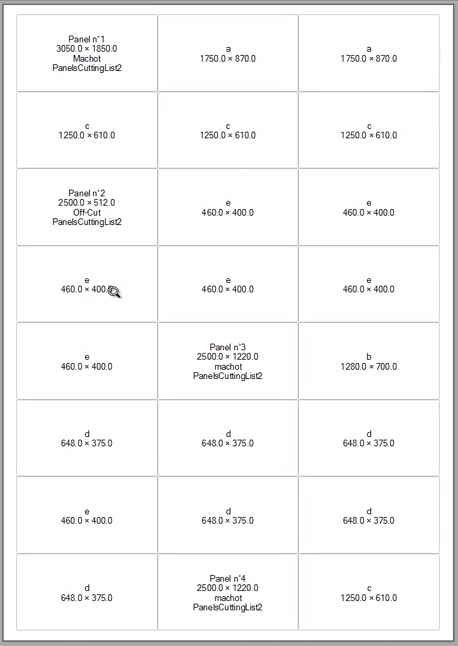
For this video, we’ve clicked on Labels Preview to show you what they look like.
To define what is printed on the labels, go to File > Labels Setup.
The Labels Printing Configuration dialogue box pops up and is where you can modify your settings.
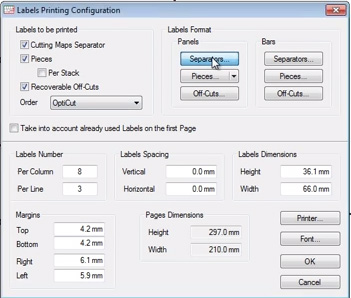
For example, click on Separators to define what will appear on the labels.
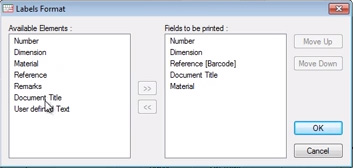
Click on an Available Element then select the >> button to move it over to the Fields to be printed Box, and hit OK.
You can also click on each field that will be printed and select Options, to have it printed as a barcode.
With this functionality you can easily print off all the labels you need for your cutting lists and to ensure a faster and more efficient workshop workflow.
Click here to download and test our board cutting software.
Interested to know about this
Hi there, please can you send your company details to us via the contact form and we can set up an online demo for you. Thanks