Wood Designer forum
stair on a boat|Page 2|Forum|WOOD DESIGNER

Hi forum,
I have started production. I have planed the steps, stringers an risers. I have cut the steps and stringers. I am working with a router guide for the steps/risers. I have to say i am not doing well. Had to call it a night as I noticed my spirit was gone. I think it might come out well, but I have to say i regret not to go for the “fake” stringer solution. Added to this, the oak is pretty tough for the rrouter to cut through.
A few questions;
1. Have the drawings taken into account the required material for the lh stringers to enter the newel?
2. I am not sure how to do the 45 degree corner joint (right hand upper/lower stringer)? I have to say I doubt this is a good joint. My experience is that the wood onboard will change some due to varying humidity. This will often mean that the 45 degrees modifies slightly.
3. There are steps that have corners with less than 90 degrees. These are entering the stringer but will leave an opening. This is not taken into account on the step drawings?
4. I have calculated the grooves in the stringer to be 33-(520-484)/2=20 (all mm). Is this correct?
5. I cannot remember if we ever discussed how the assemble the stair? Glue, skrews, nails…..might not be part of the package? I guess the clearances will vary depending of the way this is to be done?
I will try to put in some pics for next time!
Regards Per Birger

October 4, 2012
 Offline
Hello again Per Birger,
Here are the working documents for your stair.
They are in a compressed ZIP file that you can download with by right clicking and using the “save file as” options in the mouse menu.
When decompressed you will have the following files and folders:
- a sds file that can be loaded into StairDesigner for viewing and editing
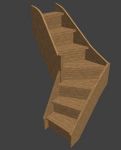
- a 3D SketchUp file of the project and the different options we have discussed
A DXF folder with:
- a 2D DXF plan and elevation of the complete stair
- a 3D DXF file for loading into any other CAD program for 3D visualisation
- a sub folder with a 2D DXF file of every separate part
You can use this files in CAD programs to add or verify dimensions, partial printing, editing shapes etc.
A PDF folder with:
- A workshop document with dimensioned plans of each part and the cutting list
- A full size template of each part ready for printing
- A full size plan of the stair ready for printing
Be careful when printing the templates to set the print scale to 1:1 or the templates will not be useable.
Before cutting, it’s good practice to verify the template size by cross referencing the template with the dimensions in the workshop documents.
Note that winding steps should have a corner cut off where they penetrate into housing.
I have purposely not marked this right angled trim cut on the steps.
If you’re not using CN, it is in fact easier to mark out and build the steps by leaving the edges extended and cutting the right angled trim corner afterwards.
To do this mark the string penetration parallel to it’s end at 15mm and mark a right angle on the step end to the point the string penetration meets the step edge.
You can also make a jig to do this quickly.
Tell me if you need more information on this and I’ll make a video to explain it.
I wouldn’t personally put any railing on a small stair like this.
I hope that you enjoy building this little stair and don’t hesitate to post if you need any help.
If you have time I’d love to see some photos of the finished stair and also as you build.
Love to see more photos of your boat too.
Have a great week end!
All the best,
Ness
PS: Just one more thing:
I have grooved the risers into the underside of the steps by 10mm and passed them over the back edge of the lower step.
Have a look at our “stair basics” document that you can download from ebook library for more info on this.

I really appreciate your prompt response. I have no doubt that this is absolutely worth of my savings ![]()
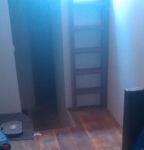
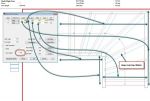
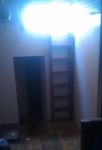
I have checked the attached jpg documents for general dimensions. It was hard to see the numbers. The length 1140mm and 860mm is what I want. The total width 520mm is also correct. The two other measurements are not easily seen – thus, not as important either. I prefer to go for the 18mm risers. The stringers should be 33mm as you have stated, leaving as much room as possible for steps. I agree on the step nosings to 45mm. You now have my agreement on overall dimensions. Please also find attached a couple of pics to visualize where the stair is to be seated.
Besides – how about railing?
pb
PS
Actually….this stair is configured with a turn. The challenge here is the headroom. Thus by having a turn I hope this would result in a less steep stair. I came to me, that I have not discussed this with you previously. I still this is a way to do it. But, as always for the no vise, I am looking for a confirmation ![]()


October 4, 2012
 Offline
Hi Per Birger,
Here’s a final model with 20mm risers for your approval. To save the files to your computer, hover over each attachment, right click and select ‘save link as…’, ‘save file as…’ or similar.
Please check the attached documents for general dimensions and head room.
If your wood is not too warped, you can plane 20mm from 1 inch boards but you might find that it would be better to go for 18mm.
Your actual stringers are 33mm, if you are making the stringers from 2 inch boards (around 50mm) you might find that a finished thickness of 40mm will save machine time and shavings.
I can change these in the design as you want so just tell me what you think is the best for you.
One final point, I have set the step nosings to 45mm this will give a little extra foot room when climbing the stair .
I’ll process the stair and send you the working documents as soon as I get your agreement on overall dimensions.
All the best,
Ness


October 4, 2012
 Offline
Hello Per Birger,
I’m sure that this is going to be much more that a paper stair.
In my opinion your risers will get some kicking as the steps are narrow on the climb .
So I would strongly suggest you use some resistant material and not MDF or chip board .
You can use oak but any solid wood, ply wood or laminated board should be OK.
In solid wood the riser thickness will depend on the timber you can readily buy locally.
Over here in France I would buy 27mm rough timber and plane it to 20mm.
Rough timber will require gluing up the riser widths, step height + 10mm.
I would suggest that a minimum thickness would be at least 15mm, 18 to 20mm being better.
To gain time you can also use ply wood or laminate panels .
A good material for risers is 3 ply solid wood like this:
3-Ply-and-5-Ply-Solid-Wood-Panels (EDIT: link no longer live, so removed)
the big advantage being that you don’t have to machine and assemble .
All the best,
Ness

I agree, lets go for the “router” version and make a professional stair…..at least on paper ![]()
As for the risers (god for all material) I would like to have your suggestion. I have not prepared the material yet. So my plan is to prepare and plane the material this weekend, and if I am lucky also cut and mold. Assembly will be next weekend if I succeed this weekend. The material for this stair is white oak.
Per Birger

Great thread and lovely tub! ![]()
Had the opportunity to rebuild the back end of something similar on the island of corfu once a few years back.
A strange experiance for many reasons, not least because I broke my toe on the second day when a huge section of oak fell on it. Really enjoyed it and also appreciate the amount of work they take up! Always something needs doing.
Looking forward to seeing the progress.

October 4, 2012
 Offline
Hello Per Birger,
If we extend the stair it is only outside the well by 120mm so this shouldn’t be a problem given the tight space.
Putting risers on the stair will change very little the useability. Small stairs like this are dangerous when going down because the narrow steps don’t leave a lot of space for to put your foot and your toes (that are the main balancing element of your body ) are not all on the step. In your case the steps are very narrow (180mm) and will be considered dangerous to descend, but given the low number of steps and the tight space they are usable.
Risers have no incidence when descending the stair.
Climbing the stair will always place your toes on the step and balance is less of a problem. The main problem in climbing is the height of the step that will make it steeper and more tiring to climb. But again with a very small stair like this one this is really not a problem either.
So we can easily go for a stair that’s has a second flight at 1140mm and I can add risers with no problem.
Technically adding risers is more work and a bit more complicated. As with the steps I would strongly suggest you house the steps and risers into the strings rather than make a lower cut string. Although a little more complicated its well worth the extra effort to build a real professional stair that will be stronger and longer lasting as well as more elegant.
If you are OK with the design send me the thickness you’ll be using for the risers and I’ll send you the working documents tomorrow.
All the best,
Ness

October 4, 2012
 Offline
Per Birger’s reply :
Youre correct. The lower staircase is definitely in the way. I have limited the top section of the stair because I didn’t want the users to hit their head. However, most users head is located in the middle not on the right hand side go their body. This means we should go for the L = 1140 alternative if this does not put the head of the trespasser in jeopardy. Pls consider the limited ceiling height as the limiting factor. In addition, we planned to turn the lower stair more towards SS side of the boat.
2 Guest(s)


 Home
Home


