Optimization parameters
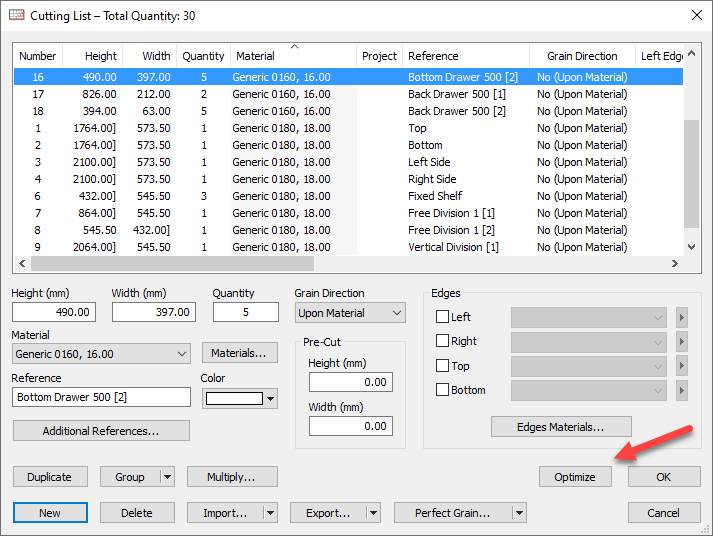
Once the cutting list is complete, click on the Optimize button.
This is available within the Cutting list window.
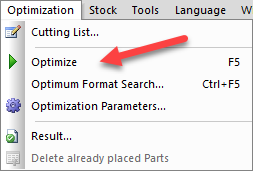
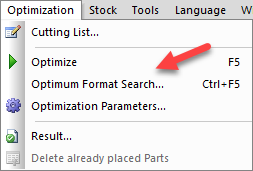
It can also be accessed from the Toolbar and Optimize menu:
The optimization runs for a short period of time:

Click Close to show the results.
Please refer to the output sections of our OptiCut resources for details:
Optimization parameters for panels
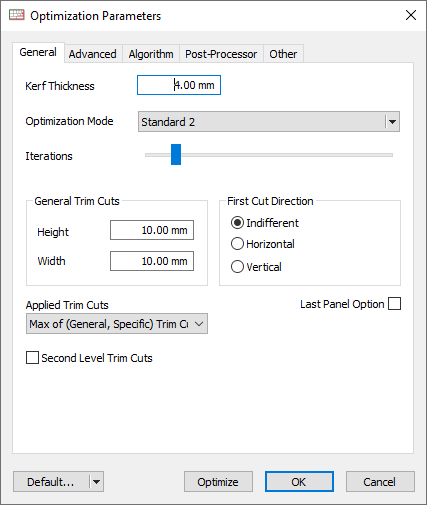
Click on the Optimization parameters icon to access the Optimization parameters, these are also accessible from the Optimization menu.
OptiCut is a powerful cutting optimization tool which is great for small to medium business, and can also be fine tuned to manage large scale industrial manufacturing.
It’s possible to adjust and test to a high degree the optimization parameters based on speed, material waste and other production preferences, which may be useful depending on your circumstances.
If you are using OptiCut with PolyBoard, PolyBoard’s Quick Design libraries include a standard OptiCut set up, including optimization parameters.
Optimization mode
The General tab includes a choice of Optimization modes:
- Fast
- Standard 1
- Standard 2
- Advanced 1
- Advanced 2
- Numerical control
These modes reflect a compromise between speed and the repetitions of the optimization algorithm and therefore how well optimized the results are.
Fast is the fastest optimization because it’s simpler. Advanced 2 will be the slowest.
Please note, even the fastest mode should result in a well optimized project. These settings work at the margin.
Standard 2 is a good optimization to start with, if optimizations are very large and slower than you need this can be adjusted. Generally though most optimizations are very quick.
The Numerical control option lets you select a specific CNC saw, in some cases the saw itself will have specific optimization constraints and preferences.
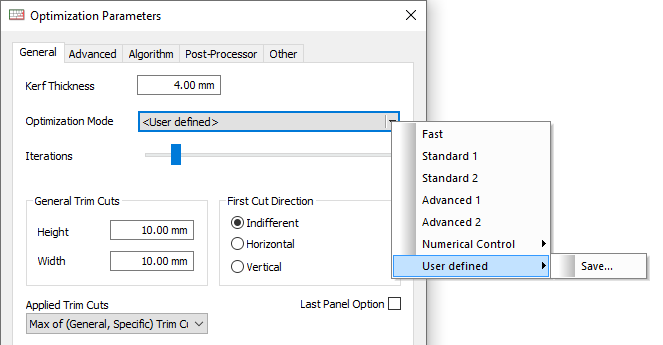
You can view and configure how hard the algorithm is working in the Algorithm tab, the settings will update depending on the chosen mode.

It’s also possible to manually change these. You will then be able to save these user defined parameters back in the General tab.
Iterations
The Iterations slider defines the statistical precision of the cutting and leads to a better optimization result without ignoring the other defined parameters. The best solutions are generally found before the 10th iteration, but in some cases only after the 50th.
Kerf thickness
This defines the thickness of the slot cut by the saw. It’s important to set this to ensure completely accurate optimizations.
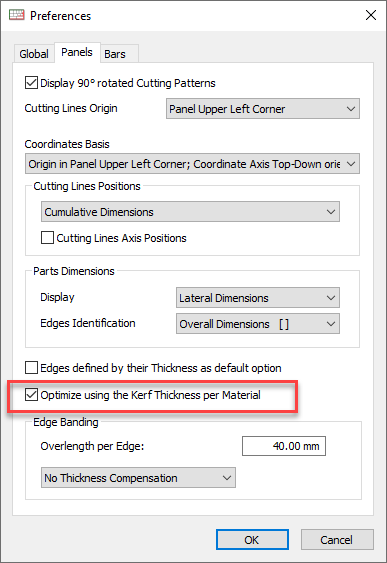
In Tools > Preferences > Panels you can select to optimize using the kerf thickness per material rather than based on the global value. This should be selected if kerf values vary for different materials.
General trim cuts
Global trim cuts that apply to all stock.
Applied trim cuts
Define how to prioritise general versus stock item specific trim cuts. Selecting the largest (maximum) value from the global and item specific settings will most typically be used.
Second level trim cuts
This option applies a second trim cut during the cutting, if the re-cutting level is higher than two.
First cut direction
Defines the direction of the first cut you do on your panel, dependent on your saw set up e.g. a vertical versus flat beam saw.
Last panel option
Where a panel is available in several formats, priority is given to the format that completes the cutting sequence by positioning all the last parts on a single panel, thus reducing waste.
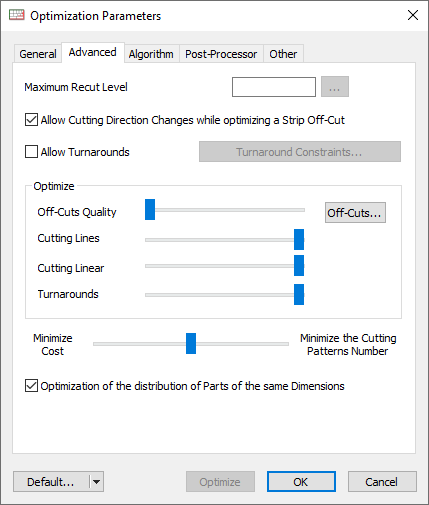
As with the Algorithm tab, the Advanced tab includes parameters that also generate a user defined set up when modified:
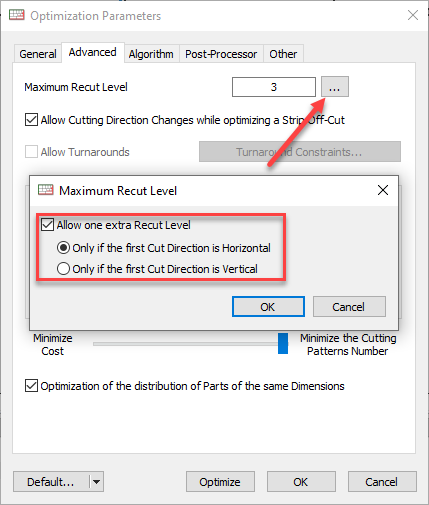
Maximum recut level
This enables you to limit the number of tested combinations and so also limits the complexity of the cutting patterns and the calculation time.
An additional option allows you to add one recut level depending on the first cut direction. This improves performance on certain models of asymmetrically constrained CNC saws.
Allow turnarounds and turnaround constraints
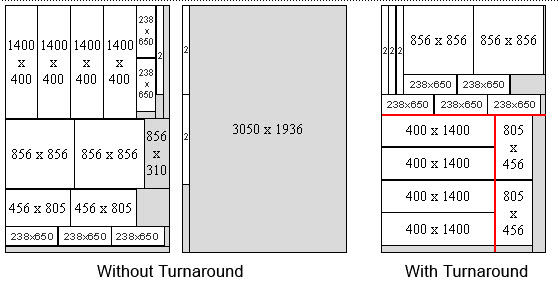
If turnarounds are enabled, a single cutting pattern will include more complex horizontal and vertical cutting directions that require the panel to be rotated during cutting.
This will reduce waste but is likely to increase sheet manipulation and therefore cutting time. Choose the best compromise for your project based on the material cost weighed against production speed considerations.

The maximum recut level limits the number of turnarounds allowed.
It’s also possible to enable turnarounds only when the initial cut is horizontal or vertical, to fit to your cutting workflow preferences.
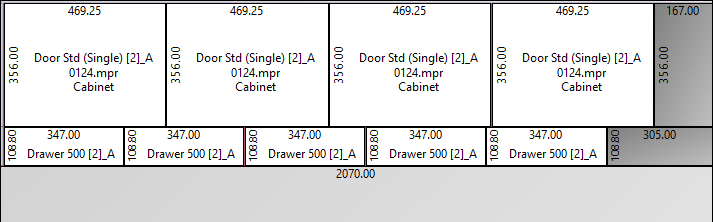
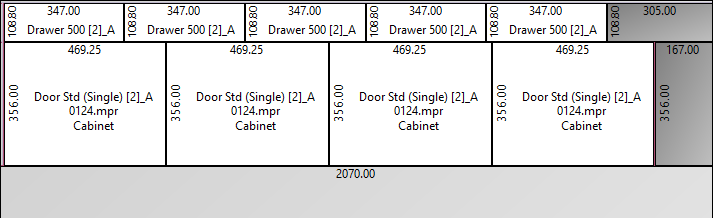
This example shows parts placed across two panels without turnaround, then all parts optimized in a more complex layout but on a single panel, with turnaround:
Optimize sliders
Adjust depending on your manufacturing preferences. Move to the right the more important the specific slider value is.
Post processor settings
Setting in the Post processor tab are covered here:
OptiCut integration with your CNC saw
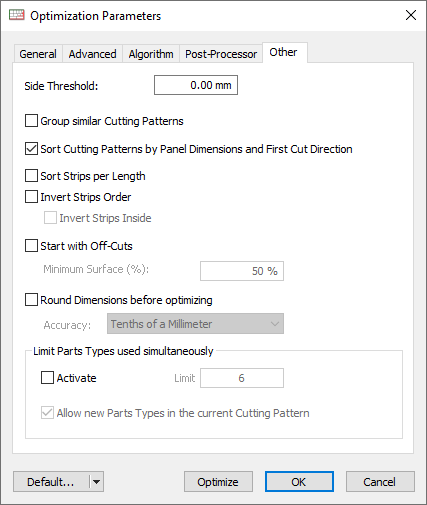
The Other tab includes further parameters.
Group similar cutting patterns
Similar cutting patterns will be placed together in the optimization. This helps to make a manual cutting process simpler.
Sort cutting patterns by panel dimensions and first cut direction
Again, this can make the cutting routine simpler. Similar sized panels and those requiring the same first cut direction are grouped together.
Sort strips per length
A strip is a section cut from one side of the panel to the other.
If sorted by length, strips with the longest total length of parts will appear first on the cutting pattern.
Invert strips order, invert strips inside
This places the shorter strips first.
The invert inside setting sorts the parts within the strips, short first then longer.
Start with off-cuts
Off-cuts will be placed before the parts on any given cutting pattern, providing the minimum surface percentage setting is met.
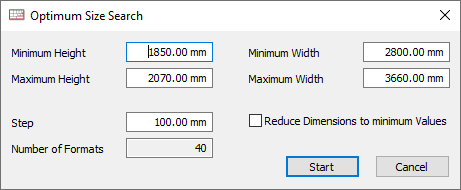
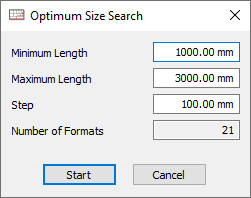
Optimize format search
This tool performs a hypothetical search for the most appropriate single panel or bar for any specific optimization. The result will not necessarily be an item in stock.
This is useful if you have the flexibility to order in other stock sizes to reflect the results of this search.
The parameters available allow you to fix constraints for the search, the panel and then the bar search windows are shown below:
Please note, this specialist feature is only available in OptiCut Pro and Pro PP.
Optimization parameters for bars
Bar optimization parameters follow a similar format to panels, with the exception of the Angles encasing feature. This configures how bars with angled ends are positioned next to each other for cutting.

Four optimization levels are available:
- None
- Minimum
- Normal
- Maximum
None corresponds to a straight cut based on the maximum lengths of the parts.
When the angle matching requires a double cutting line, the following two parameters come into play:
- Double cutting lines order
- Additional cutting thickness
This specifies which of the two cutting lines is made first and how much space is left between the two lines.
In most situations, the Minimum level is enough, while Normal and Maximum aim at handling more complex situations.
Please note, this specialist feature is only available in OptiCut Pro and Pro PP.
The Advanced tab includes the Off-cuts length control parameter. This avoids the creation of off-cuts when their length lies between the minimum and maximum values.

This function increases the possibilities of producing re-usable off-cuts. However, it generally leads to an increased number of required bars.