PolyBoard to OptiCut post processor label synchronisation
This set up is used to send PolyBoard post processor data fields to OptiCut for print out on OptiCut’s labels. Typically this would include the CNC file name shown as a barcode.
Once set up, you output the CNC files from PolyBoard Pro PP as normal. Automatically after that OptiCut will load with the cutting list open and ready to optimise.
Here we have a PolyBoard project. Let’s see how to set up an export of this project to OptiCut and print the correct labels with bar codes.
We will need to set up PolyBoard to export the correct information and then set up OptiCut to print the correct information.
PolyBoard set up
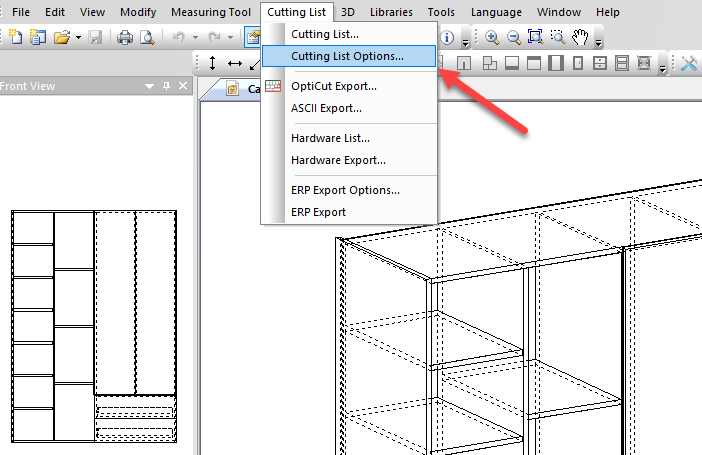
Go to Cutting lists > Cutting list Options:
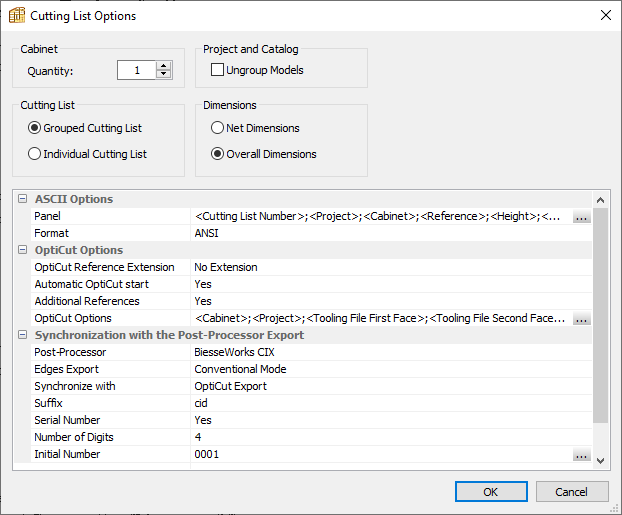
Set Cutting list options
Set:
- Automatic OptiCut start to “Yes”
- Additional references to “Yes”
- Post Processor to the post processor you will be using
- Synchronize with OptiCut Export
- Serial Number to “Yes” if you are assigning a number to the machine files rather that a name; this is recommended if you use bar coding as it will keep the bar code short, if set to “No” the machine file name will be exported as the panel name/reference
Note: PolyBoard can export multiple additional references to OptiCut.
Additional references are information exported by PolyBoard that contain:
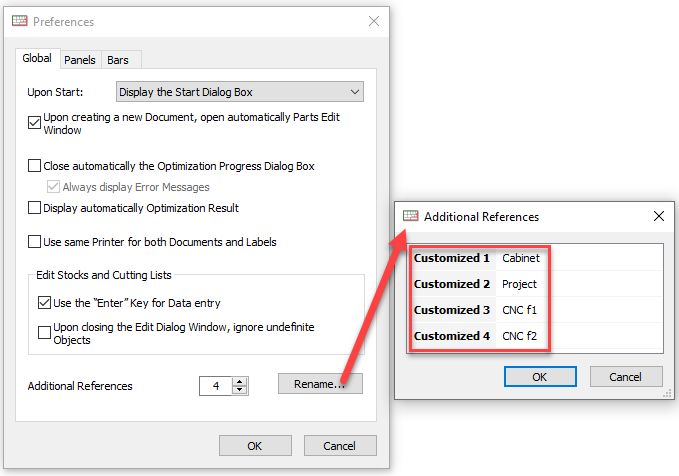
- Reference 1 : cabinet name
- Reference 2 : project name
- Reference 3 : machine file name for face one (CNC f1)
- Reference 4 : machine file name for face two (CNC f2)
- Etc.
OptiCut set up
Additional references set up
As mentioned additional references are information exported by PolyBoard that contain:
- Reference 1 : cabinet name
- Reference 2 : project name
- Reference 3 : machine file name for face one (CNC f1)
- Reference 4 : machine file name for face two (CNC f2)
This information is imported into OptiCut as extra columns in the cutting list.
By default the columns are named “Customized 1-2-3-4, etc.
In OptiCut it’s possible to create as many extra columns as you want.
Let’s rename the columns to correspond to the information imported from PolyBoard.
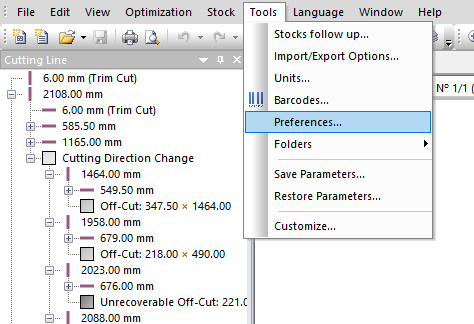
Go to Tools > Preferences.
In the Preferences dialogue box:
Set “Additional References” to 4 and click the rename button.
Rename the references:
Labels set up
Go to File > Labels Set up.
In Labels Printing Configuration, click Parts.
In the Labels Format window drag and drop the appropriate Available Elements fields to the Fields to be printed list.
Select CNC f1 and click Options.
Tick the Print as Barcode box.
Do the same for the CNC f2 field.
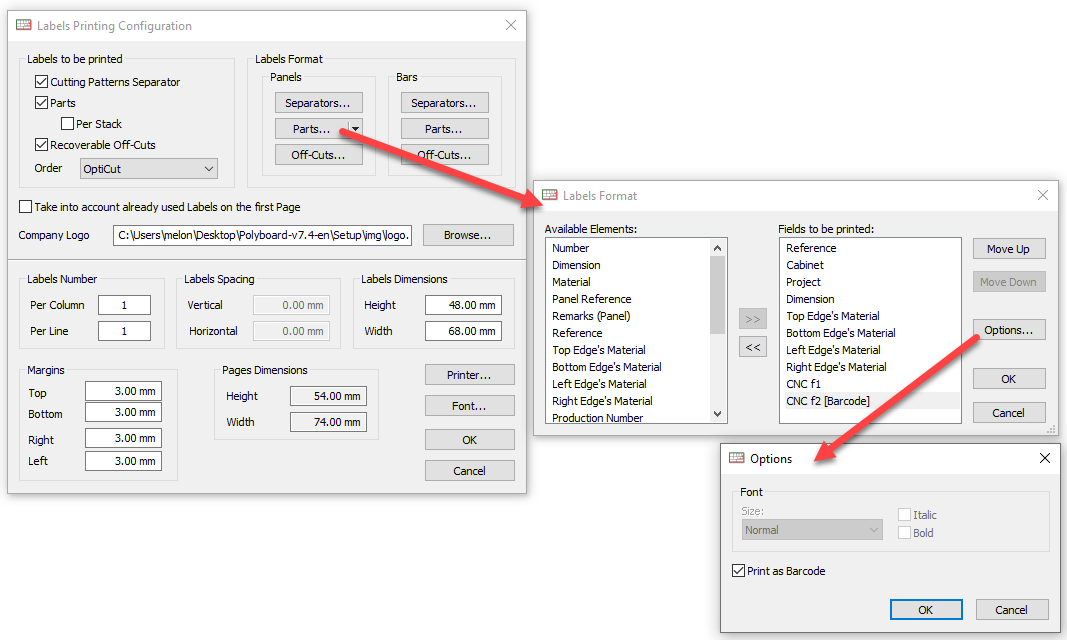
For Label printers that print one label at a time set Label Number to :
- Per Column = 1
- Per Line = 1
Barcode set up
If you require the data field as a barcode, go to Tools > Barcodes.
Set the correct Barcode format and sizes.

Export the post processor files from PolyBoard
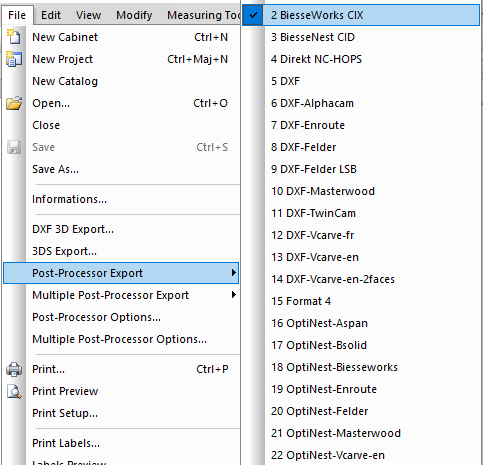
Go to File > Post Processor Export and choose the appropriate Post Processor for your machine. A tick/check mark will be shown next to the post processor that is synchronised with OptiCut.
PolyBoard will ask for the folder to save the OptiCut (.ocp) file.
Then automatically open the cutting list in OptiCut.
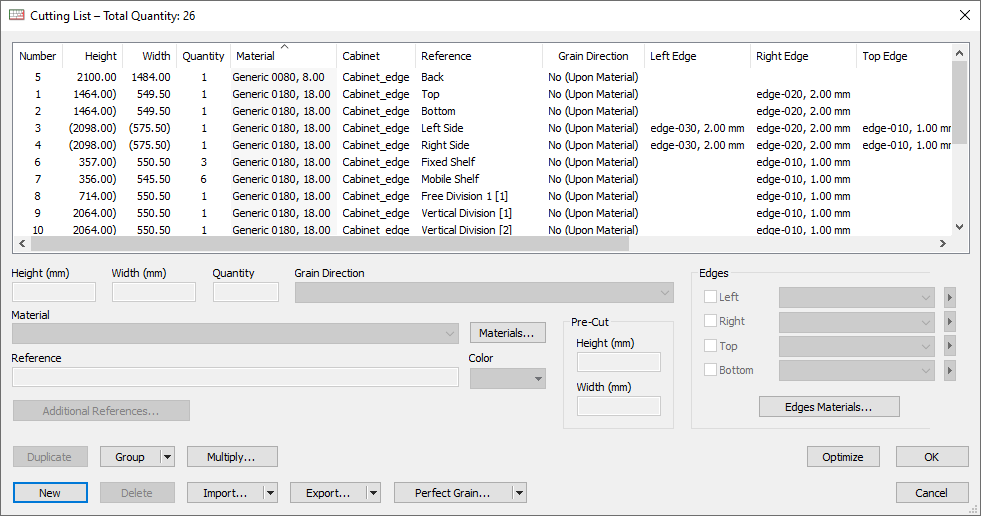
Click the optimisation button to generate the cutting maps.
You can use the View menu to choose the text information printed on each part on screen as well as in the printed report.

To see labels go to File > Labels Preview:
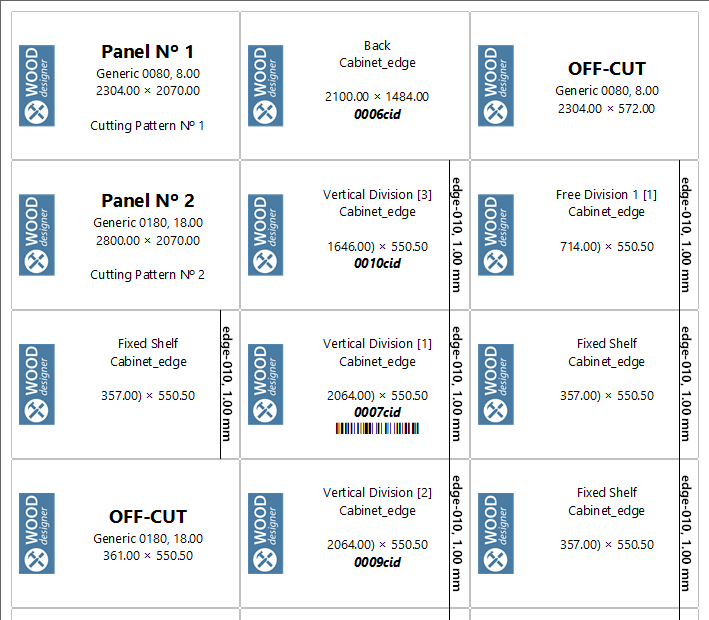
Note that the machine file names are printed as barcodes.
Double sided machined parts have 2 barcodes.